Step-by-step instructions on how to draw a rose. Find out how to draw a rose! This drawing illustration will walk you through the drawing strategies you should do with your pink pencil drawings.
I will show you in this illustration how I created the transcended.
For this floral design, I used common materials throughout the home. I would have preferred not to use quirky crafting materials as I had to draw an exercise that no doubt anyone can try – you can try it right now if you need it! Also, check our cool drawings.
We should let everything go!
Draw Supplies to Draw a Rose:
- Standard HB pencil.
- The folded rubber band is handmade, but you can use any eraser.
- Pencil sharpener
- A cotton swab
- White paper
- A photo of A Rose
Instructions for Drawing a Rose
Step 1
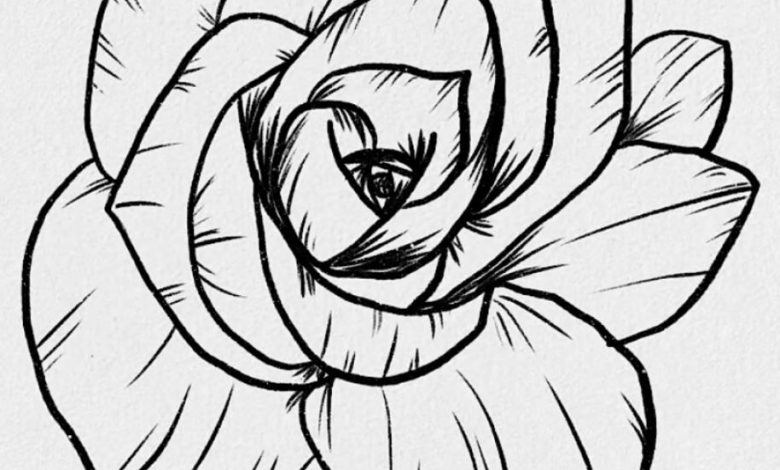
I find it easier to start with a rose that attracts me to see the focal point of the rose. Find the deeper petal and draw your design there. Make sure you tighten the center of gravity of your document as you will be working outwards.
Please make sure you start small when drawing the inner petals so they don’t fall off the page when you pull the outer petals!
The study highlights the lower petal where I started my drawing.
Step 2
Draw each petal in turn and see where they match. Try not to stress about adding shadows now. The main thing is to draw a light pen project of the whole flower.
Make sure you use a light touch to make rooting easier, assuming you want to make changes.
Step 3
When you have drawn the entire outline of the rose, you can start hiding it. Again, I find it easier to monitor “where I am” in the drawing when there’s a chance it will begin with the deepest petal and spread outward.
There are two different ways you can approach obfuscation:
- Fade to Light: Detect darker regions and fade them out first by constantly chasing lighter areas.
- Light to full: Start with the weak areas and gently blend them. Gradually increase the pen’s tension as you move toward the darker areas.
Step 4
I used the primary strategy for this design, starting with the opaque regions. You can use whatever process works most suitable for you!
Proceed with the shadow and work on your strategy to avoid the flower. I worked with a twisting motion, circling from the center outwards.
You can scrub the Graphite with your cotton swab whenever you’ve hidden an entire region. It will blend the Graphite, soften the pencil marks, and smooth the surface. IT is a fantastic method for flowers to achieve that tender and sensitive affection.
The stumps and tortillons are made from a tightly corrugated, delicate, and smooth sheet of paper that tapers to a point on one side. Because of this, they consider greater precision and control when mixing than a Q-tip.
Step 5
Add more shadows and soften them with the Q-tip. You can also use the eraser to erase some graphite from the paper, relieving areas you may have overshadowed.
The image below shows how some areas are blended perfectly with a cotton swab, while several sites are quickly masked with the pen. It shows you how drawing continues as a structural cycle of laying Graphite.
After running the Q-Tip over an area, you will notice that some darker areas have been lightened as the Graphite on the Q-Tip has been removed.
Step 6
Tip: It doesn’t matter if the pen tip has become blunt when hiding. When hiding, it’s wiser to use an unsharpened pencil rather than a sharp one, as it makes inclusion easier.
There are 4 Main Strategies for Create This Rose Design:
- Draw the squad diagram
- Construction and layering: add shadows
- Smooth and blend with a cotton swab.
- Remove areas that are too dull with an eraser.
The Rose Drawing is Ready!
Also read: 6 TYPES OF GOOD HOOKS FOR ESSAYS